If you’ve ever stood in a warehouse watching a stretch wrapper struggle—loads with film that’s too loose to stay intact mid-transit, or so tight that the stretch film tears, wastes product, or damages the packaging underneath—you know how frustrating that downtime can be. As a supplier of stretch wrapper control systems, I’ve spent thousands of hours talking to facility managers, maintenance techs, and operations leads who assume “adjusting tension” is just a turn of a dial. But that couldn’t be further from the truth. Tension in a stretch wrapper control system isn’t a one-size-fits-all setting—it’s a dynamic variable that depends on the load, the film, the wrapper itself, and even the environment around your facility. Over the years, I’ve helped fine-tune systems for everything from 50-pound corrugated boxes to 2,000-pound metal coils, and today I’m breaking down the science and step-by-step process to get tension right, no guesswork required. Stretch Wrapper Control System

First, let’s define what tension actually is in the context of stretch wrapping, because if you don’t grasp this basic mechanic, all the adjustment steps won’t make sense. Stretch tension is the amount of force applied to the stretch film as it’s pulled from the roll and wrapped around your load. The goal is to stretch the film just enough so it adheres to itself when overlapped, creating a unitized load that doesn’t shift—without over-stretching it to the point of breaking, wasting material, or compressing fragile products like cardboard, shrink-wrapped electronics, or produce crates. Too little tension, and the film will sag, slide, or come loose during shipping; too much, and you’ll see film tears, uneven wrapping, increased material costs, and even damaged load contents.
The biggest mistake I see new customers make is setting tension based on a generic number from an old manual. Every load is different, and even small changes—like switching from 80-gauge to 100-gauge film, or moving from wrapping small retail boxes to large industrial drums—require tension adjustments. Let’s start with the core components of a stretch wrapper control system that directly impact tension, because adjusting these parts is how you make meaningful changes, not just twisting a random knob. Most modern wrappers have three key tension-control elements: the brake system, the pre-stretch mechanism, and the control panel’s digital (or analog) tension setting. Older wrappers might rely more on mechanical brakes, while newer ones use servo-driven systems for precision. For the purpose of this guide, I’ll focus on systems we supply, which combine both mechanical and digital controls for consistency.
Let’s get practical. I’m going to walk you through a step-by-step adjustment process that I teach every new client’s maintenance team. It starts with prep work—you can’t adjust tension on a dirty wrapper with worn parts. First, inspect the film roll: check for nicks, tears, or uneven edges on the core, because a damaged roll will pull uneven tension no matter what you do. Next, clean the brake pad and pre-stretch rollers with a lint-free cloth and isopropyl alcohol; dust, old film residue, or rubber buildup on these parts creates friction that throws tension off. If your brake pads are worn thin (less than ¼ inch thick), replace them—this is a common hidden cause of inconsistent tension, and it’s easy to overlook. Finally, calibrate your load height: most control systems use a load height sensor to adjust wrap tension for top and bottom layers, so if the sensor is dirty or misaligned, it will apply the wrong tension to the top of tall loads.
Once the prep is done, it’s time to set a baseline tension for your specific load. This is where the science comes in, not guesswork. First, identify your load type: light (less than 500 pounds, like retail boxes), medium (500–1,500 pounds, like pallets of canned goods), or heavy (over 1,500 pounds, like metal coils or machinery parts). Then, identify your film gauge: standard for most operations is 80–100 gauge, but heavy-duty loads need 120–150 gauge, and lightweight products might use 60–70 gauge. For our customers, we provide a starting tension chart tailored to their system, but as a general rule: light loads with thin film use 15–20 pounds of tension, medium loads use 20–30 pounds, and heavy loads with thick film use 30–40 pounds. Wait, you might be thinking—pounds of tension? That’s a unit of force, not a vague percentage. This is why working with a control system supplier helps: we calibrate our systems to display actual tension force, not abstract settings, so you’re never guessing.
Now, let’s get hands-on with the adjustment steps. First, if you have a digital control panel, start by accessing the tension settings menu. Most modern systems have a “manual tension test” function that lets you run a short wrap cycle on an empty pallet (no load) to test tension before running a full load. For analog systems, you’ll use the tension adjustment knob, which is usually labeled, but I always recommend marking the current setting with a marker before adjusting, so you can revert if needed. Run the test cycle: pay attention to how much the film stretches. If it’s breaking during the test, the tension is too high. If it’s not stretching at all, it’s too low. A properly stretched film will stretch 100–300% of its original length—meaning if it’s 12 inches long when relaxed, it pulls to 24–48 inches when properly tensioned. That’s the sweet spot: enough to create adhesion, not enough to cause breakage.
Once you have a baseline, test it on an actual load. Run a full wrap cycle on a small test load, then inspect it. What are you looking for? First, check the bottom layer: if the film is loose and sagging, you need to increase tension. If the bottom layer is tearing, you need to decrease tension. Next, check the top layer: it should be tight enough to hold the load together, but not so tight that it’s compressing the top boxes. A good way to test adhesion is to try to pull the film away from the load; if it peels off in large strips, tension is too low. If it tears when you pull it, tension is too high.
But here’s the part most people miss: tension isn’t static during the wrap cycle. The top layers of a load need different tension than the bottom layers, because the bottom layers support the weight of the entire pallet. That’s why modern stretch wrapper control systems use a taper tension setting—this reduces tension as the wrapper moves up the load, so you don’t over-stretch the top layers and damage fragile products. I recently had a client who was wrapping pallets of glass jars; they were setting the same tension for every layer, and they had a 12% damage rate from top-layer film stretching too tight. After adjusting the taper tension to decrease by 5 pounds per layer as we wrapped up, their damage rate dropped to less than 1% in two weeks. That’s the kind of real-world impact getting tension right can have.
Another common variable is environment. If your facility is in a humid climate, stretch film becomes more pliable, so you’ll need to increase tension by 5–10% to get the same adhesion. If you’re in a dry, cold climate, film is stiffer, so you’ll need to decrease tension by the same amount to avoid tearing. I learned this the hard way when a client in Minnesota called me in February saying their wrapper was breaking film every time they ran a load. It was -10 degrees Fahrenheit outside, and their facility wasn’t heated enough—so the film was brittle, and their tension was set for the summer. Adjusting the tension down 10 pounds fixed the problem immediately, no part replacements needed.
Wait, what about pre-stretch? A lot of customers confuse tension with pre-stretch, but they’re related. Pre-stretch is the process of stretching the film before it’s applied to the load, which reduces the amount of film you use (saving you money) while maintaining tension. There are two types of pre-stretch: roller pre-stretch, which uses two rollers to pull the film and stretch it, and gear pre-stretch, which is more precise. When adjusting tension, pre-stretch works hand-in-hand: if you have high pre-stretch, you can run lower tension on the brake, because the film is already stretched. If you use lower pre-stretch, you’ll need higher brake tension to get the same unitization. This is a key adjustment point I cover in on-site training for our clients; many folks don’t realize they can pair pre-stretch and tension to cut film costs by 15–25%.
Now, let’s talk about troubleshooting common tension issues, because even after you adjust, problems pop up. If you’re seeing inconsistent tension from load to load, check the film roll tension: if the core isn’t tight, the film will unwind unevenly. Make sure the film roll is secured tightly in the holder, so it doesn’t spin freely. If you’re seeing horizontal wrinkles in the film, that’s usually from tension that’s too low on the side layers—increase the tension slightly and re-test. If you’re seeing vertical tears, that’s often from the brake being too tight, or the film being nicked on the edge of the wrapper’s frame. I once had a client with vertical tears on every load; we spent hours adjusting tension before realizing a small piece of old film was stuck in the edge guide, cutting the film as it unwound. A quick clean fixed it, no tension adjustment needed.
Consistency is the name of the game here. Once you’ve found the right tension for your loads, mark the setting on your control panel (or write down the analog setting) for each load type. Keep a log: what load, what film gauge, what tension setting, how much film you used. Over time, you’ll build a reference guide that takes guesswork out of every adjustment, even when your team changes. For our customers, we also offer remote support to double-check settings—we can connect to your control system remotely (with your permission, of course) and verify that your tension is calibrated for optimal performance.
Before I wrap up, let’s talk about why this matters for your bottom line. I mentioned this earlier, but it’s worth repeating: proper tension reduces film waste, cuts downtime from torn loads, and reduces product damage. The average warehouse I work with saves $2,000–$5,000 a year just by getting tension right, without buying new parts or upgrading their entire wrapper. That’s a huge return on a simple adjustment.
If you’re struggling with tension in your stretch wrapper control system, or you need help calibrating your system for your specific loads, our team is here to help. We provide on-site assessments, remote support, and custom training tailored to your operations to make sure your wrapper is running at peak efficiency. Whether you’re a small operation wrapping 50 pallets a day or a large facility wrapping 500, we can help you get tension right.
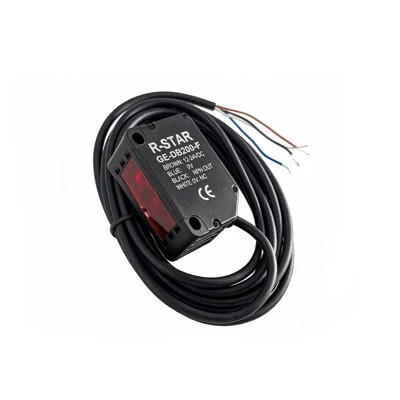
If you’d like to learn more about adjusting your stretch wrapper tension, or discuss custom solutions for your operation, get in touch with our team to arrange a consultation.
Stretch Wrapper Control System References
- Stretch Wrapping Technology: Tension Control Principles and Best Practices. 2022. Packaging Machinery Association.
- Industrial Stretch Wrapper Performance: The Impact of Tension Calibration. 2021. Journal of Warehouse Operations & Automation.
- Film Mechanics for Unit Load Stability: Tension, Pre-Stretch, and Material Properties. 2020. Institute of Packaging Professionals.
- Environment and Stretch Film Behavior: Adjusting Tension for Temperature and Humidity. 2023. Warehousing Education and Research Council.
Wuxi Rstar Electric Co., Ltd.
With abundant experience, we are one of the most professional stretch wrapper control system manufacturers and suppliers in China. Welcome to wholesale bulk customized stretch wrapper control system at competitive price from our factory. If you have any enquiry about quotation, please feel free to email us.
Address: 9th Floor, Building 9, Shengfeng Lianzhi Valley, No.67 Zhujiang Road, Xinwu District, Wuxi City
E-mail: rstarbz@163.com
WebSite: https://www.rstar-wx.com/
